With the bulk product upload feature, you can add your new products or menu items all at once, instead of having to create products one by one.
It takes three steps to upload your products to talech:
- Download the template from the Items > Products menu in talech.com.
- Complete the template with your product information.
- Upload your completed template as an .XLS file.
That’s it! You will find details on how to complete these steps below.
In this article
Upload new products in bulk
Download the template
- Login to talech.com.
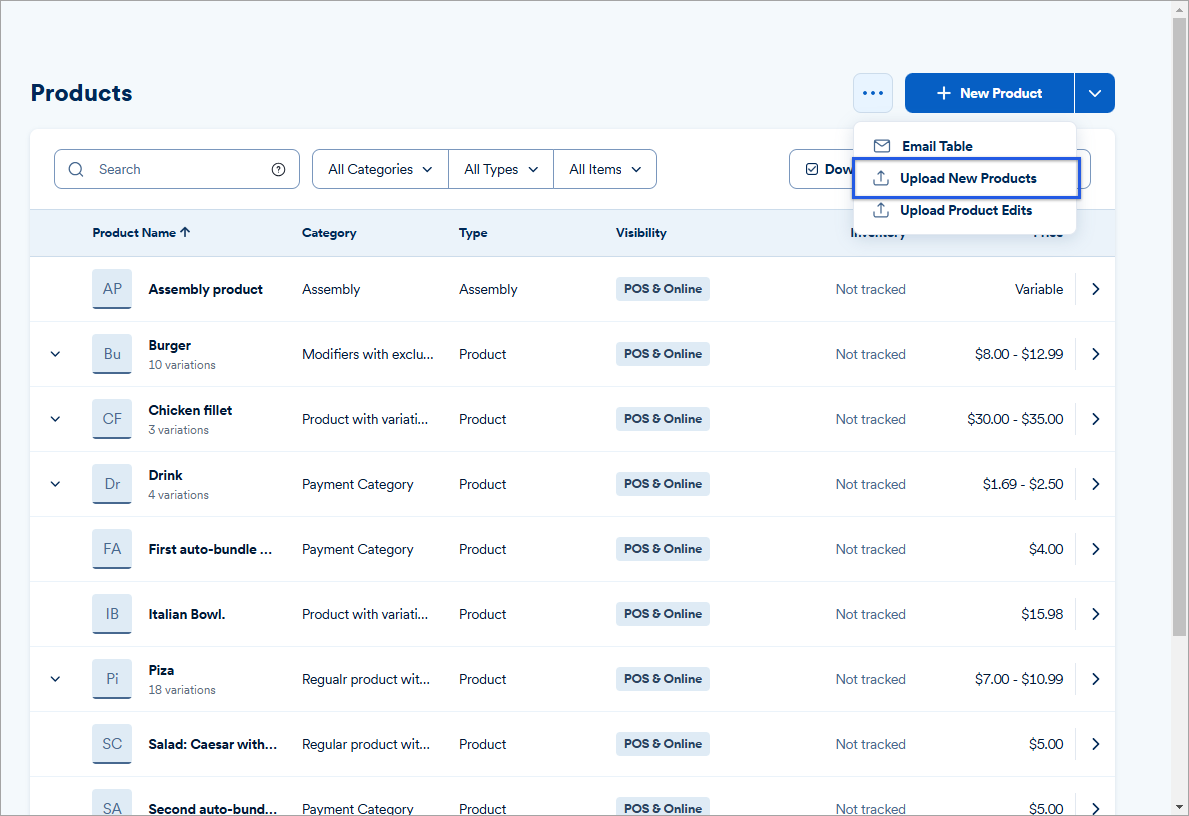
- Navigate to Items > Products.
- In the top right, select the ellipsis > Upload New Products.
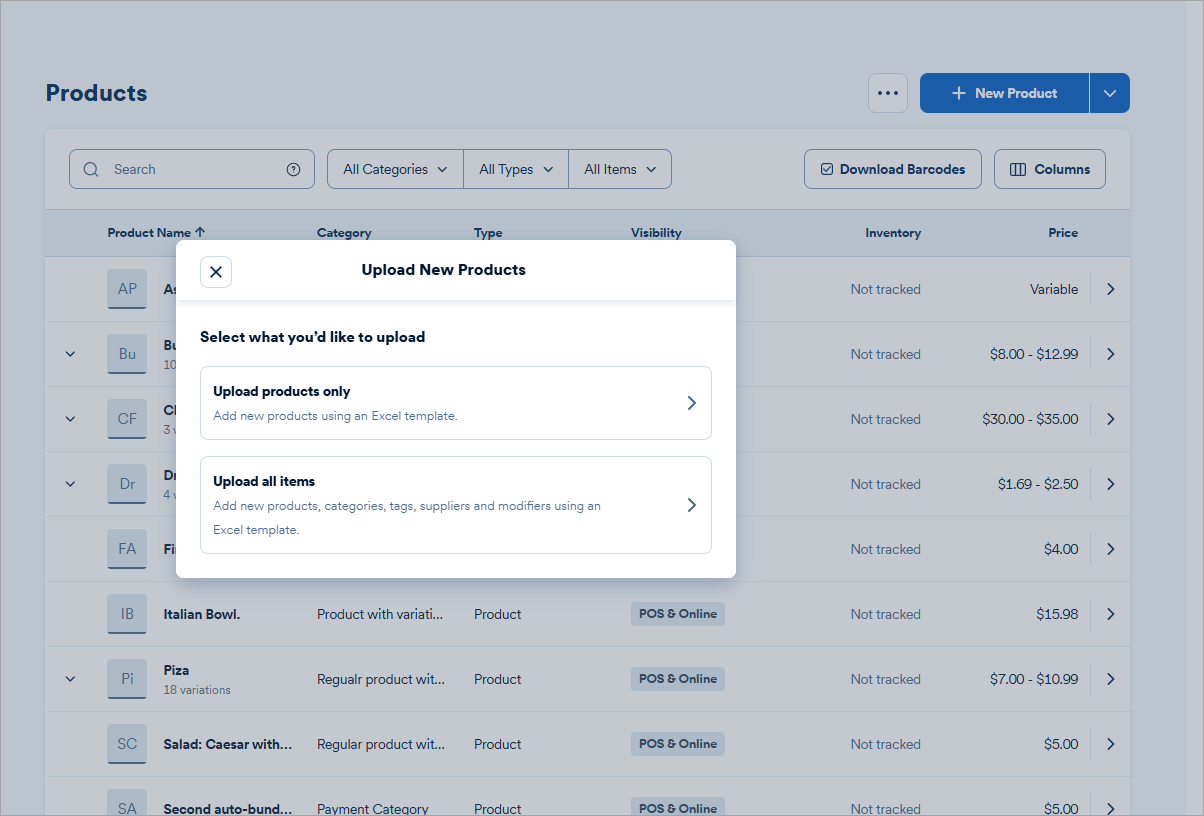
- From the Upload New Products pop-up, select an option:
- Upload products and services only: Add new products or services only via an Excel template. This is best used when adding new products/services to your existing menu.
- Upload all items: Add new products or services, categories, tags, suppliers and modifiers via an Excel template. This is best used when there is no existing menu and you want to upload an entire menu.
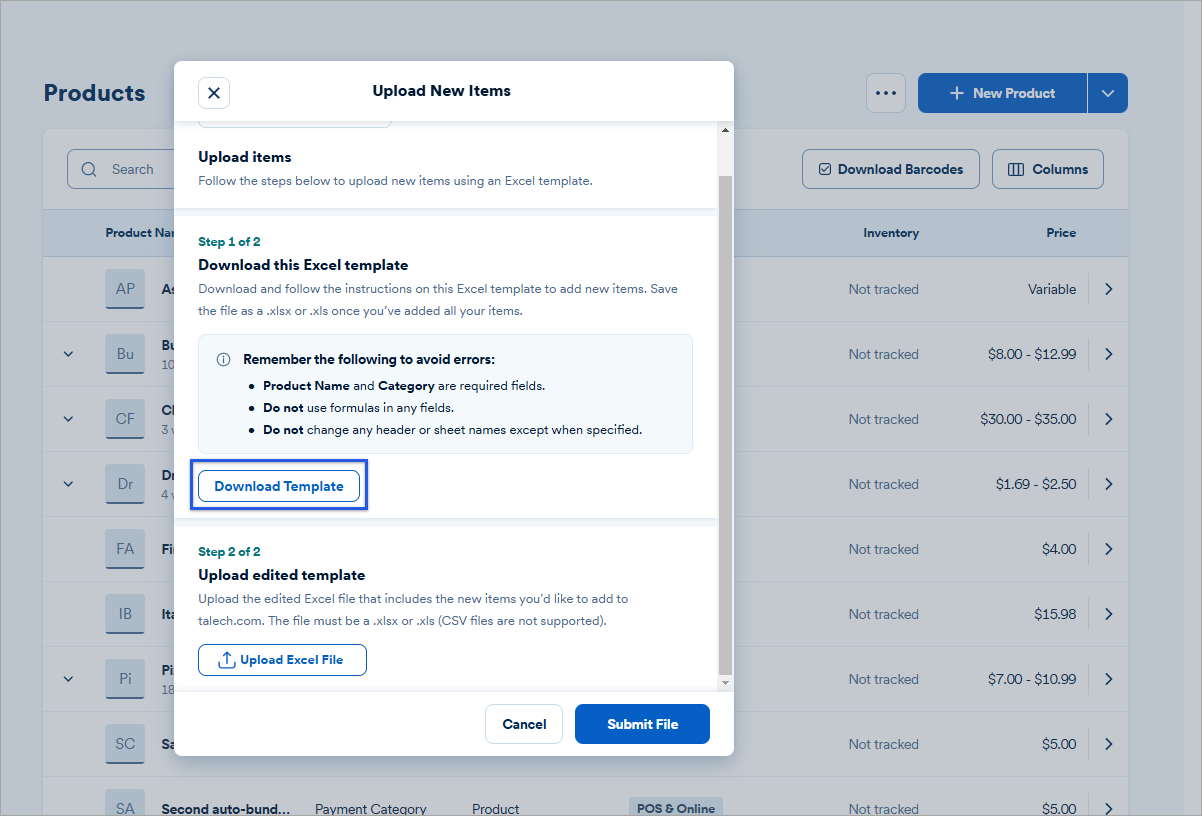
- On the next pop-up, a 2-step process is outlined. In step 1 of 2, select Download Template. This downloads a copy of the template to your computer. Proceed to the next section Complete template.
Back to top
Complete template
A few things to keep in mind when completing the template:
- Do not use formulas in the spreadsheet.
- Only use the spreadsheet to add new inventory items.
- Do not change the header or sheet names except wherever explicitly specified.
- All names are case sensitive (e.g., hat and Hat will be treated as different categories).
- The Full Menu template must be used to upload modifier lists and variations.
Template key reference
The template includes various tabs, or sheets. Each tab captures a different part of your product list (e.g., products, variations, tax, etc.).
| Note: Not all columns or tabs are required to upload your products. Below, you will find the required and optional fields and a brief explanation of each column to help you fill out the template. |
Products tab
List each product that you want included in your menu/product list.
Required fields
|
Category
|
Note: A product can only belong to one category.
|
|
Product Name
|
Max character count: 100 characters
Product name is how the product will show up in talech and on the customer’s receipt. |
Optional fields
|
Supplier
|
You can add a supplier name if you plan to track inventory, issue purchase orders, or mark up prices by supplier.
Note: You must create a new supplier in the supplier tab.
|
|
Product Type
|
Specify whether the product should be classified as a Regular, Bundle, or Assembly type of product.
If this field is left blank, the default value of Regular will be used.
Note: talech does not currently support the creation of bundles or assemblies via spreadsheet upload. Bundles and assemblies will need to be created via the app or website.
|
|
Cost
|
Your product cost, cost of goods sold (COGS).
|
|
Markup
|
The % above cost you want to price the product. If a supplier is associated with the product, it will use the supplier markup % if one exists.
Leave the price field blank if markup is specified.
|
|
Price
|
The sales price of the product.
Leave the price field blank if markup % is specified or if variable pricing is used. Variable pricing is when the price of a product is determined at checkout.
|
|
Available Quantity
|
Quantity in inventory at the time of upload. You can leave the quantity field blank if you are adding products that you don’t want to track or don’t require tracking such as services.
|
|
Item #
|
Internal stock keeping unit (SKU) used to help track inventory. This can also be used to search for products on the register.
|
|
Barcode #
|
Auto generated or manually created barcode that can be scanned at checkout.
|
|
Item Card Color
|
Products in your register will display in colored boxes. You can use card colors to help with categorization.
|
|
Product Short Name (Restaurant Only)
|
Give your menu items a short name for kitchen printers or kitchen display systems (KDS).
|
|
Description
|
Include a product description to provide employees with helpful details about a product.
Note: The product description will not appear on customer receipts.
|
|
Units
|
Unit of measurement of weight or volume by which a product is sold.
Note: Units should not be used to state the measurement unit of the item.
|
|
Visibility
|
You can choose from Active, Hidden, or Hidden from Guest on each product or on a category.
|
|
Inventory Alert (On/Off) (Premium Account Feature)
|
If you would like to receive an alert when a product hits a specific quantity, enable inventory alerts by selection ON in the dropdown. Leave it blank if you don’t want alerts.
|
|
Alert Threshold (Premium Account Feature)
|
If you enable the Inventory Alert shown above, you need to set the threshold for when the alert is triggered.
|
|
Reorder Amount (Premium Account Feature)
|
Set the specific amount to be your default order quantity in the purchase order flow when you hit your threshold.
|
|
Tag
|
You can apply tags that have been created in the tags sheet in the file. If the tags are not already in the tags sheet, they will appear as an error.
|
|
Sales Tax/VAT
|
Your product will inherit the tax settings of the category. If you wish to override the tax settings, add the tax names as a comma separated list under the column "Tax".
|
|
Variations
|
Use this column if a product has variations
If your product has variations, replace the column header name labelled Variation 1, with the actual variation name (e.g., size or color). Please create the variations with the options in the Variations tab.
|
Category tab
Gives you different views of your inventory by category type. You can adjust tax settings by category, category position, or category tags.
Required fields
|
Category Name
|
Products are organized by category.
|
|
Tags
|
Include tags associated with this category. Use commas to separate tags. You can use tags to group categories.
|
|
Category Position
|
The position of the category in the talech Register.
|
|
Visibility
|
You can choose from Active, Hidden, or Hidden from Guest on each category or individual product.
|
|
Sales Tax/VAT
|
Select On or Off from the dropdown list. This setting will apply to all products within the category unless the product is set to override it. If you leave it blank, the tax will be off.
|
|
Shipping Tax
|
Select On or Off from the dropdown list. This setting will apply to all products within the category unless the product overrides it. If field is blank, the tax will be OFF
|
|
Handling Tax
|
Select On or Off from the dropdown list. This setting will apply to all products within the category unless the product overrides it. If field is blank, the tax will be OFF
|
Tags tab
You can use tags to group categories or create shortcuts to certain products. You can also use tags for reporting or discounts.
- For example, you can use tags if you want to break out your alcohol sales separate from your beverage sales.
|
Tag Name
|
The name of the tag. If using tags, create the list of tags here before associating with categories.
|
Supplier tab
Create a supplier or suppliers in this tab if you plan to assign products to suppliers, issue purchase orders, or mark up prices by supplier.
Optional fields
|
Supplier Name
|
Name of the supplier, usually a business.
|
|
Email
|
Email address of the supplier. This is used to send purchase orders within talech.
|
|
Contact First Name
|
First name of supplier contact.
|
|
Contact Last Name
|
Last name of supplier contact
|
|
Phone, Fax, Address, City, State, Zip, Country
|
Contact information for the supplier.
|
|
Notes
|
Optional field for keeping track of notes about the supplier.
|
|
Markup
|
The percentage markup that all products associated with this supplier will use. If specified, the product price will be the cost times the markup percentage.
|
Modifiers tab
Create product modifiers if your product can be modified. You can associate one or more modifiers with a product. Modifiers can be one of three types: add-on, exclusion, or variation. Each modifier can have one or more options, e.g., bacon, cheese, lettuce, tomato.
| Note: If you are using variations, separate each variation option by row for each product. Each variation of a product can have its own barcode/item number and price, so each is treated as its own product line. |
Required fields
|
Modifier Name
|
The name of the modifier.
|
|
Modifier Type
|
Add on, Exclusion, or Variation.
|
Optional fields
|
Has Price
|
Note: If there is an additional cost, you will need to complete the Modifier Pricing Tab- see chart below for more information.
|
|
Tare Weight Unit
|
Unit of measurement (weight or volume) of container or packaging in which product is sold. Select an option from the dropdown menu.
If a container or packing is not used, leave this blank.
|
|
Min Options
|
The minimum number of modifiers a user must select before adding the product to the order. This can be left blank if irrelevant.
|
|
Max Options
|
The maximum number of modifiers a user must select before adding the product to the order. This can be left blank if irrelevant.
|
|
Option 1, Option 2, etc.
|
The name(s) or the modifier option(s). Each modifier can have one or more options.
Each option should have its own individual cell in the spreadsheet. Add additional columns if there are more options associated with the modifier. |
Modifier Pricing tab
(Only applicable for Add-On Modifier type)
Complete this tab if an add-on modification to the product has an additional cost. For example, if a customer adds bacon, it costs $2.50.
Required fields
|
Modifier Name
|
The name of the modifier.
|
|
Option
|
The name of the modifier option.
|
Optional Fields
|
Price
|
The price for the modifier option.
|
|
Tare Weight
|
The weight of the container for that modifier option. Only applicable if the modifier has weight-based units and Tare Weight set to On.
|
Back to top
Upload the template
When you are finished filling in the applicable fields, make sure the file is saved as an .XLS file.
- Navigate to Items > Products.
- In the top right, select the ellipsis > Upload from Excel.
- Select the upload option you selected earlier to download your Excel template.
- Upload products only
- Upload all items
| Note: Make sure you select the same option you used earlier to download the Excel template from. If you select a different option, the Excel template won’t upload correctly and the bulk upload of your menu will error. |

- In Step 2 of 2, select the Upload Excel File button. Locate and select your updated Excel template.
- Select Submit File.

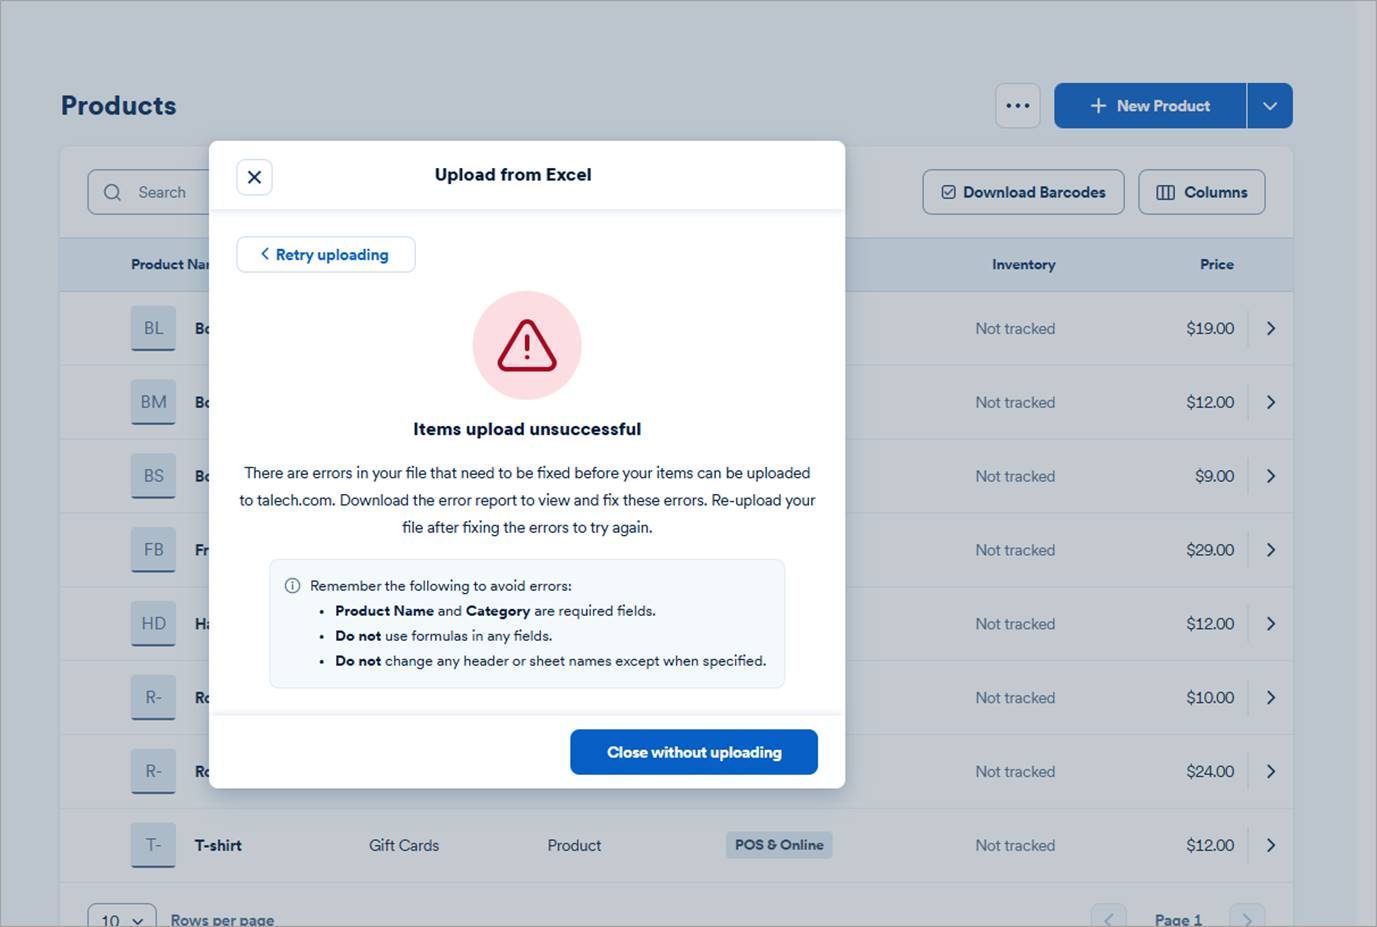
- On the next screen, it will tell you if your file uploaded successfully or not.
- If the file upload was successful, your menu will be available on talech.com shortly.
- If the file upload was not successful, proceed to the next step.
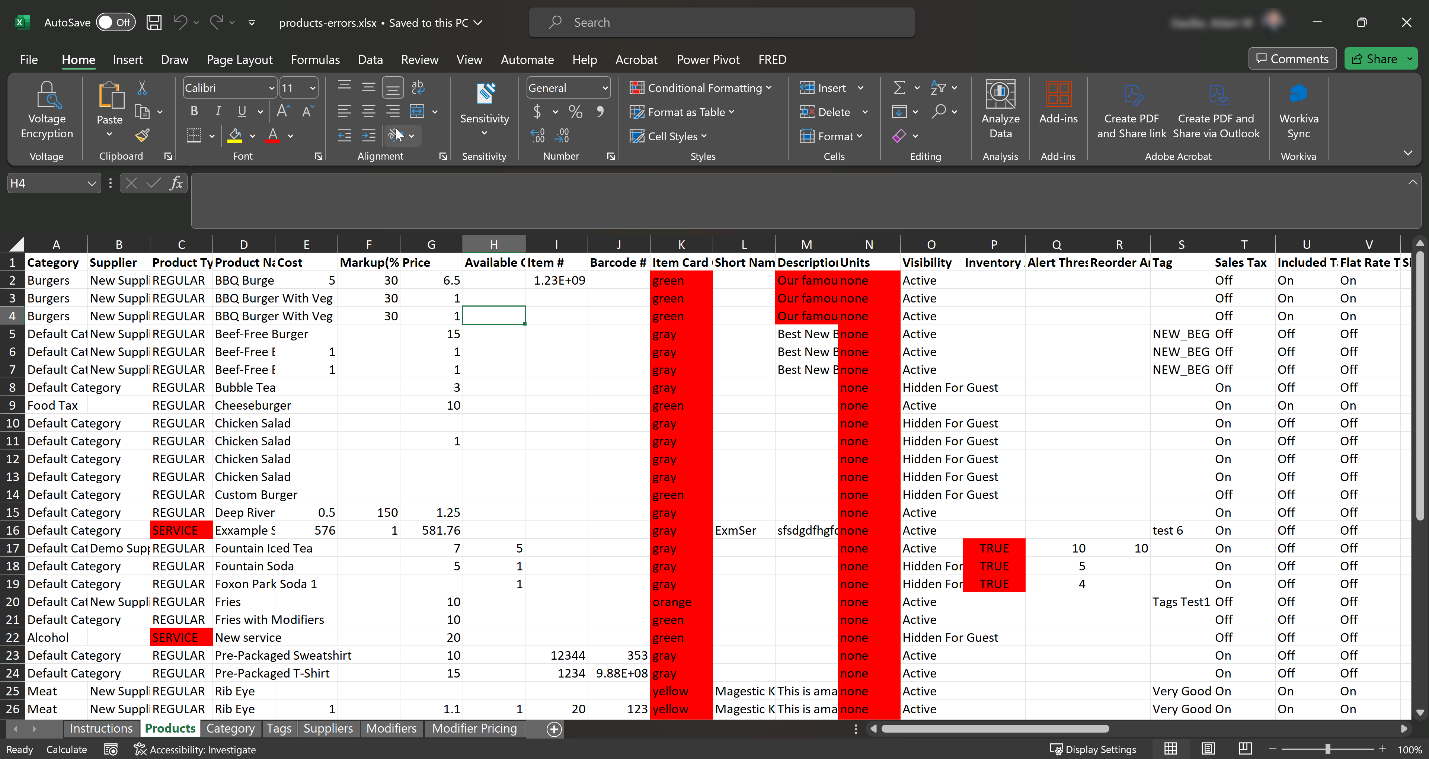
- If the file upload was not successful, select Download error template.
- Open the error template and review the errors.
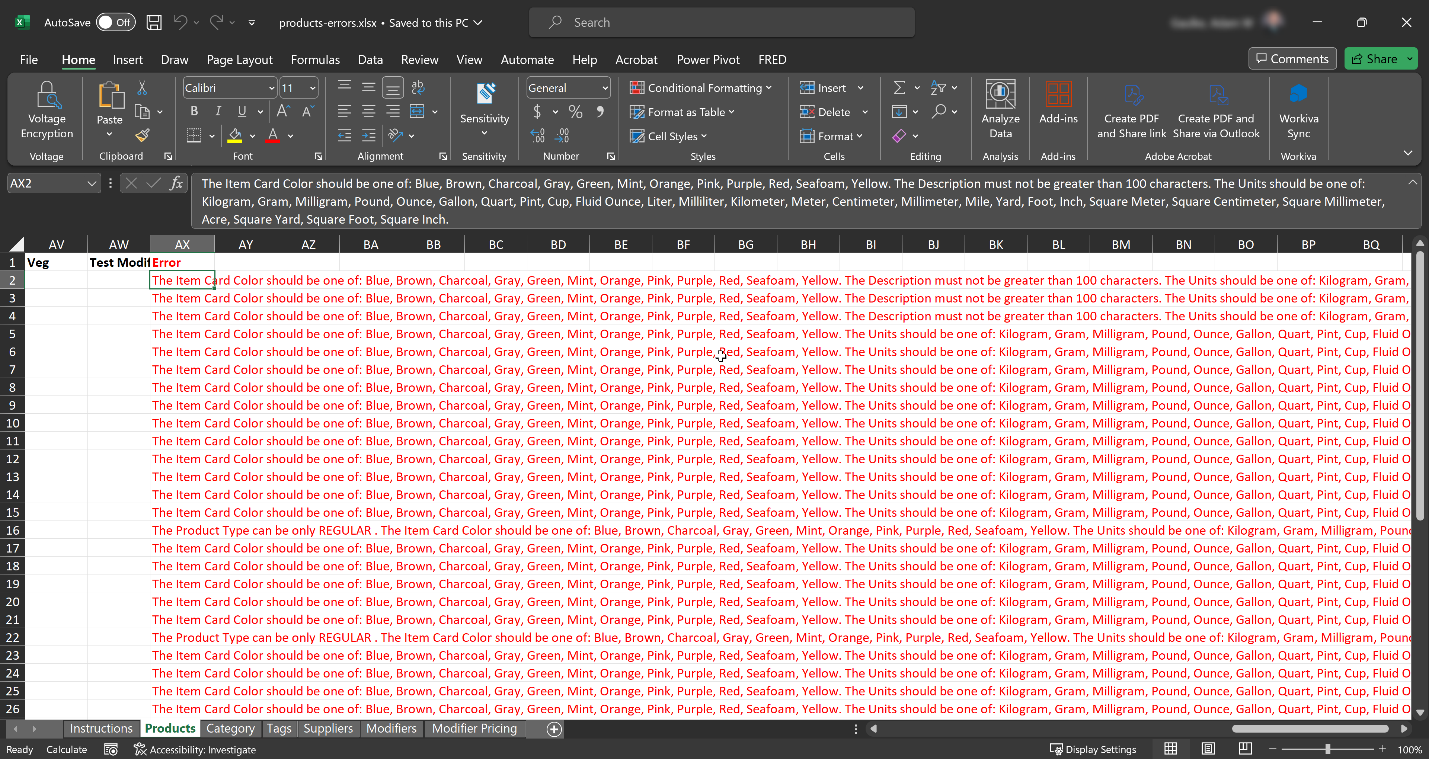
- Cells shaded in red are errors that need to be resolved.
- In the last column the description of the error is listed for each row where an error is found.
- Resolve each error and save the spreadsheet. Try re-uploading the file by following these steps again under Upload the template section above.
Back to top
Edit existing products in bulk
To edit your existing products in bulk instead of one by one, follow these steps.
- Login to talech.com.
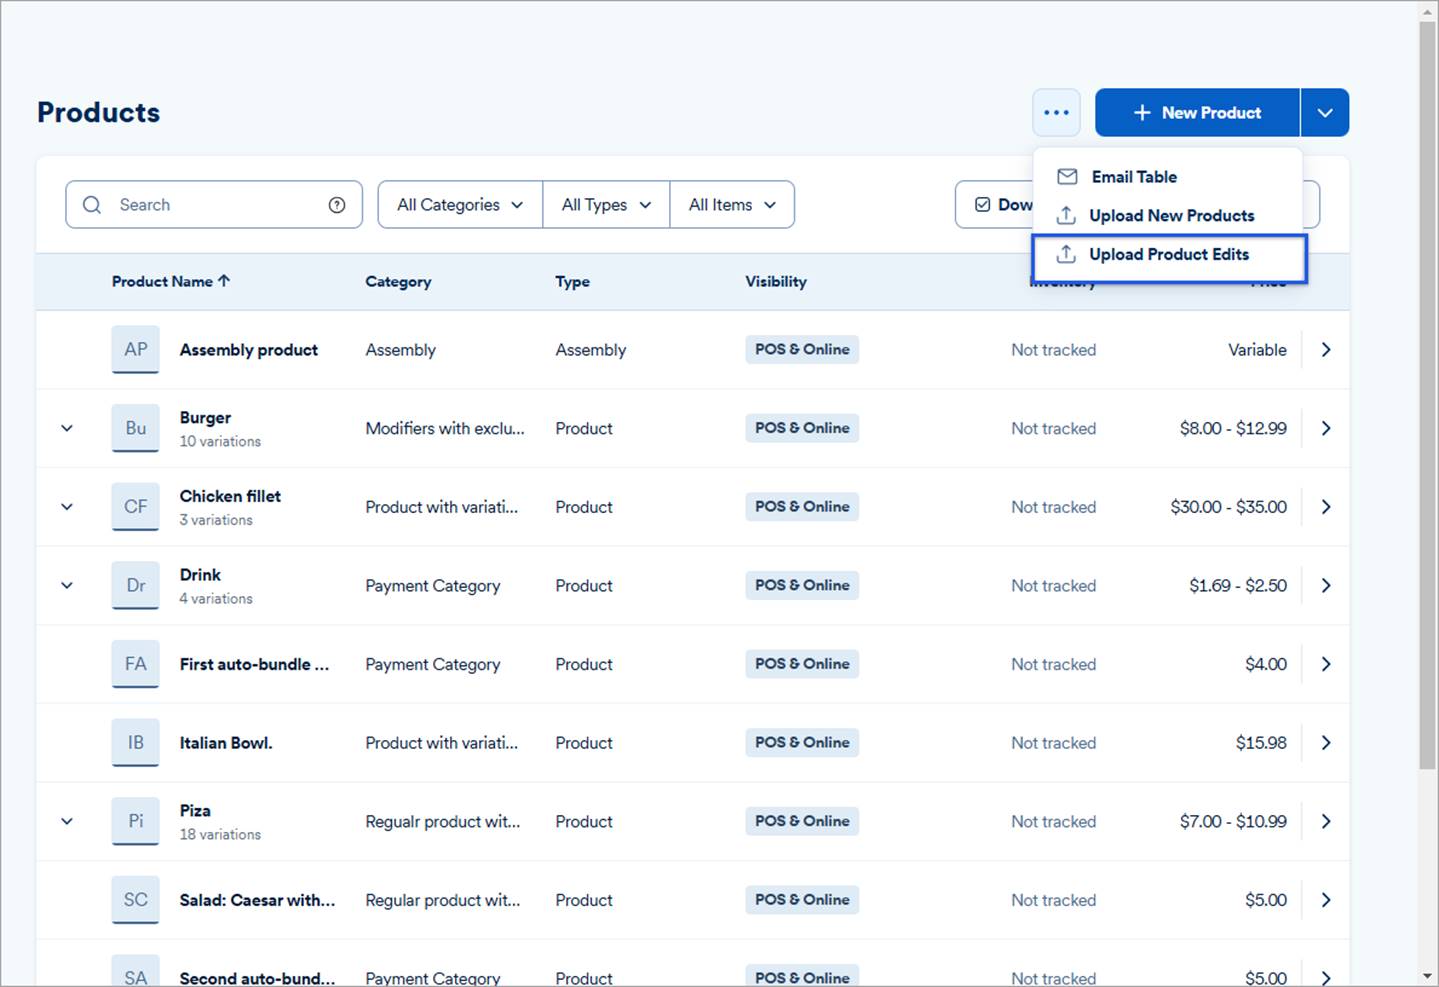
- Navigate to Items > Products.
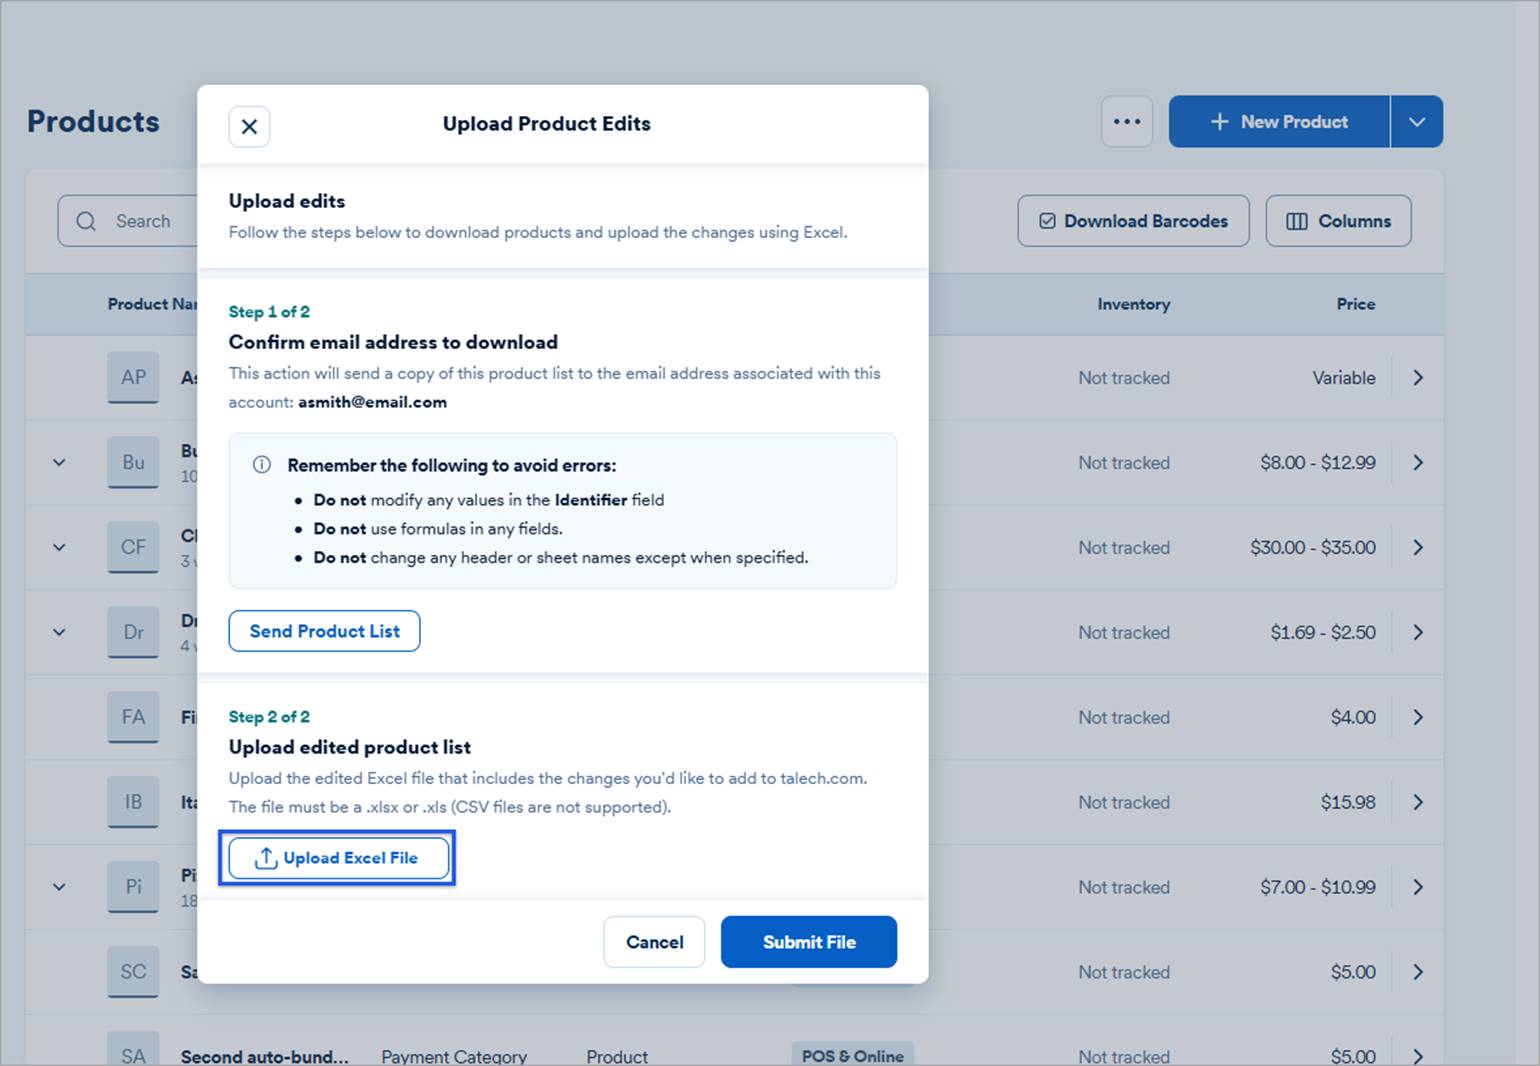
- In the top right, select the ellipsis > Upload Product Edits.
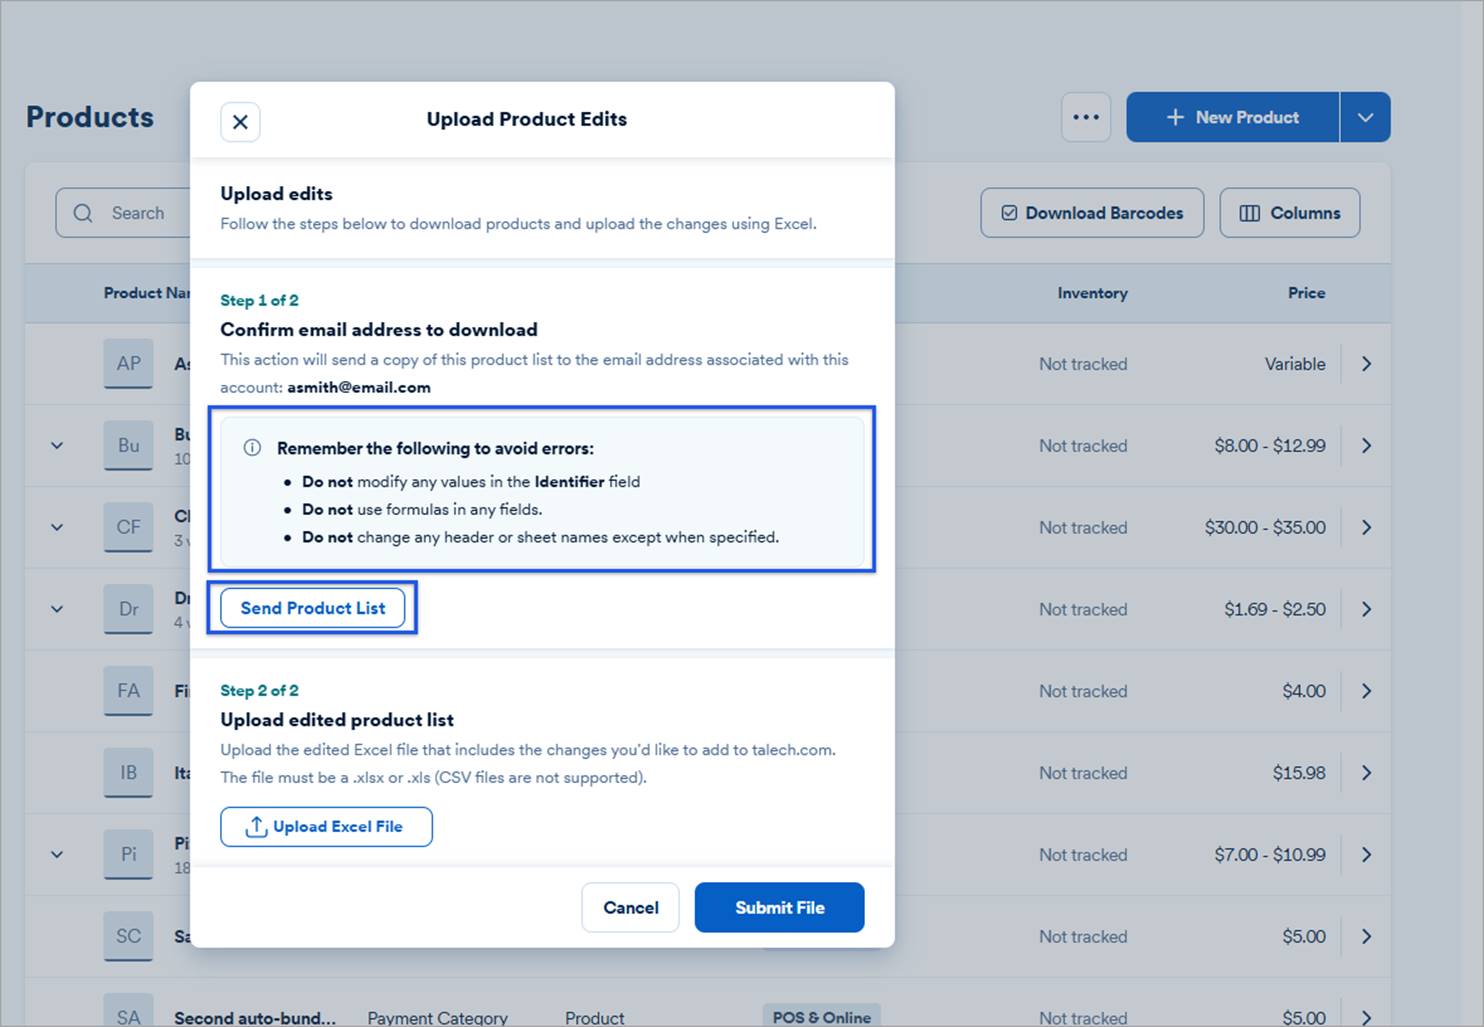
- A pop-up window appears with a 2-step process. Confirm the email address listed is correct for the file to be sent to and note the reminders about avoiding file upload errors. Then select Send Product List under the Step 1 of 2 section.
| Note: If the email is incorrect, close this window and go to Settings > Business Information and update the Contact Email in the Contact Info section. Then come back to this step. |
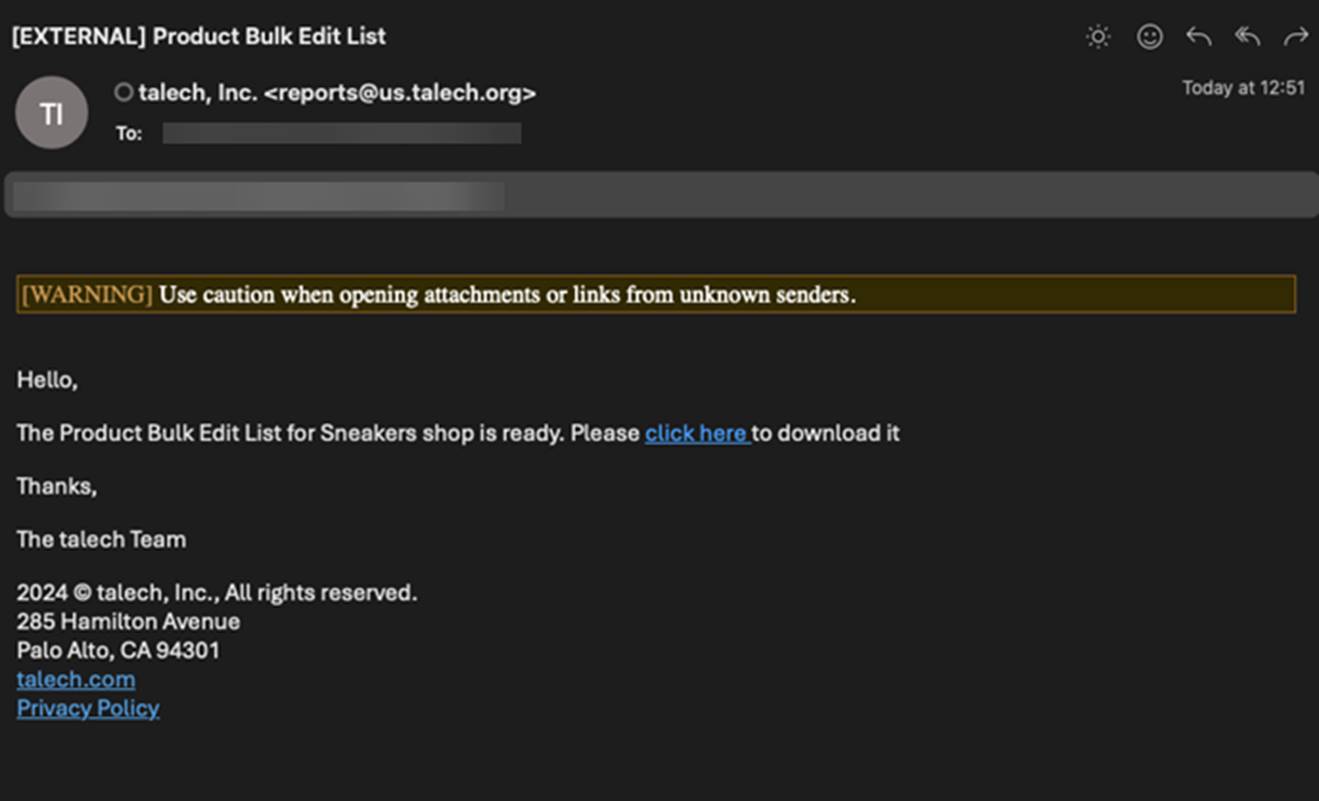
- Check your email for the product list .xls. Download the .xls and update the products as needed. Refer to the section above called Complete template for guidance on what each of the sections/tabs of the .xls refer to and how to update.
- Once your updates are complete, return to talech.com and complete step 2 to upload your edited .xls file.
- Select Upload Excel File.
- Select Submit File.
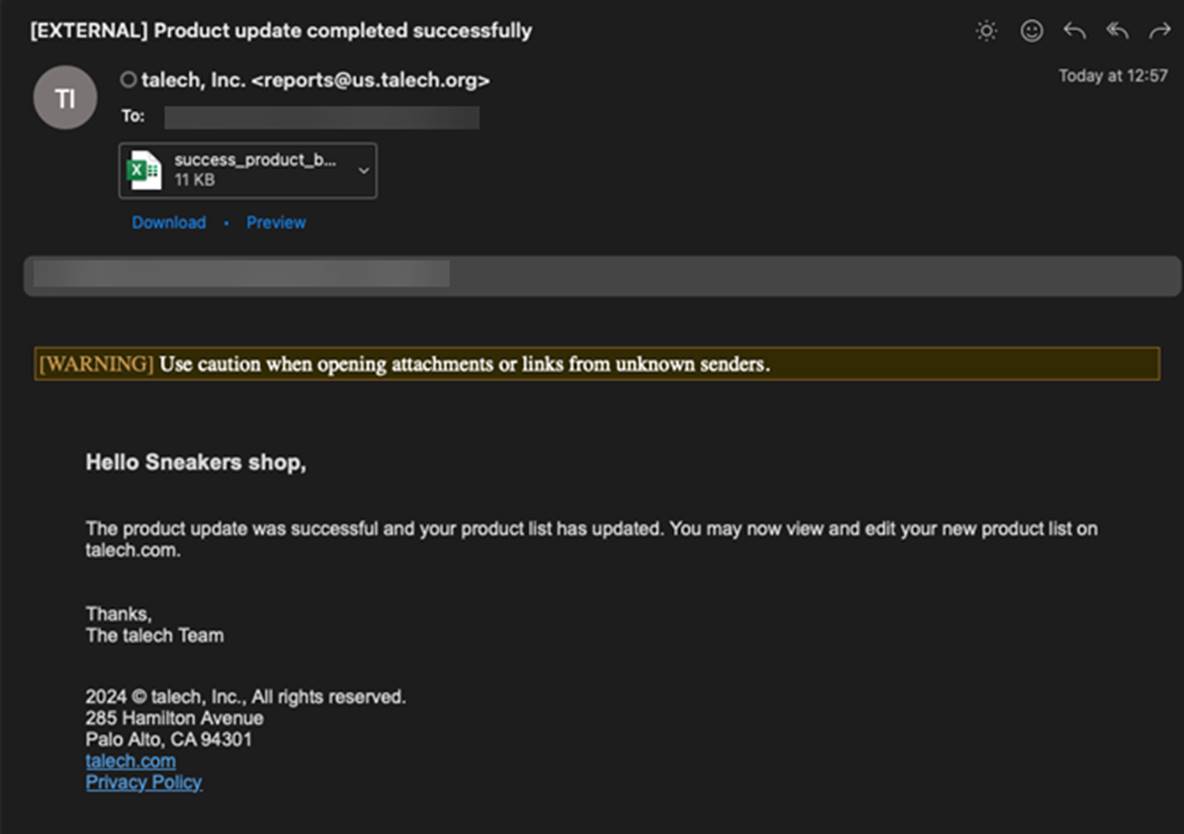
- After submitting, a notification appears telling you the file is being processed. Wait for an email that will either confirm the file upload was successful or failed.
- If successful, the email states the product update was completed successfully. You are done!
- If unsuccessful, the email states the product upload failed and provides the menu template with errors highlighted within.
- Open the error template and review the errors.
- Cells shaded in red are errors that need to be resolved.
- In the last column the description of the error is listed for each row where an error is found.
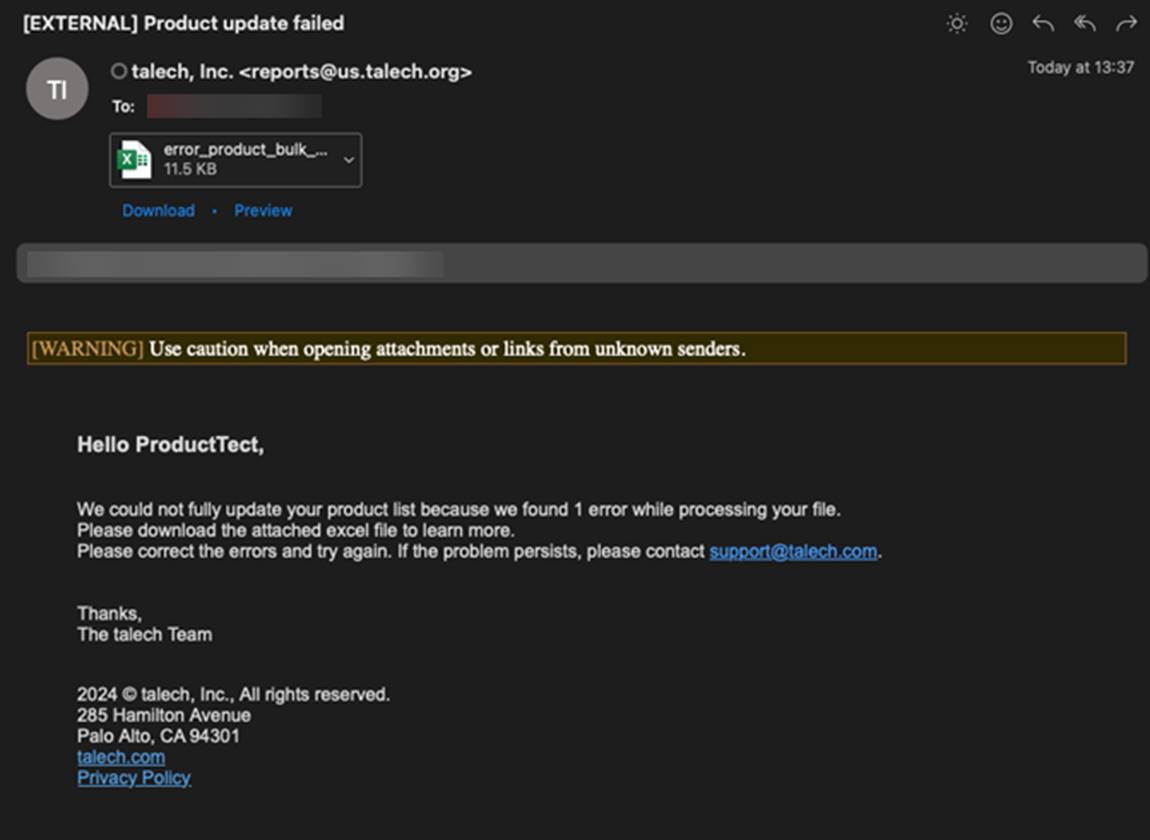
- Once you’ve resolved the errors, re-upload the Excel file again and wait for your email confirmation.
- If successful, you are done!
- If unsuccessful, try resolving the errors in the attached spreadsheet again and re-upload. If issues persist, contact our support team via one of the methods listed in Contact Us - talech Support Options.
Back to top
Need more help?
- talech training & device support: 1-888-995-1998
- Paytura merchant support: 1-855-4-PAYTURA or contact Paytura