You can add images of your products to your Menu in the talech Register App or on the talech.com site. Simply follow the steps below.
In this article
Add menu images from your talech Register app
| Note: You will need to have the image you wish to upload saved to your iPad already. |
- From the Register, go to Dashboard > Back Office > Menu.
- Select the product you wish to add a picture to.
- Tap the colored square in the top left corner next to the name.
- You will have three options:
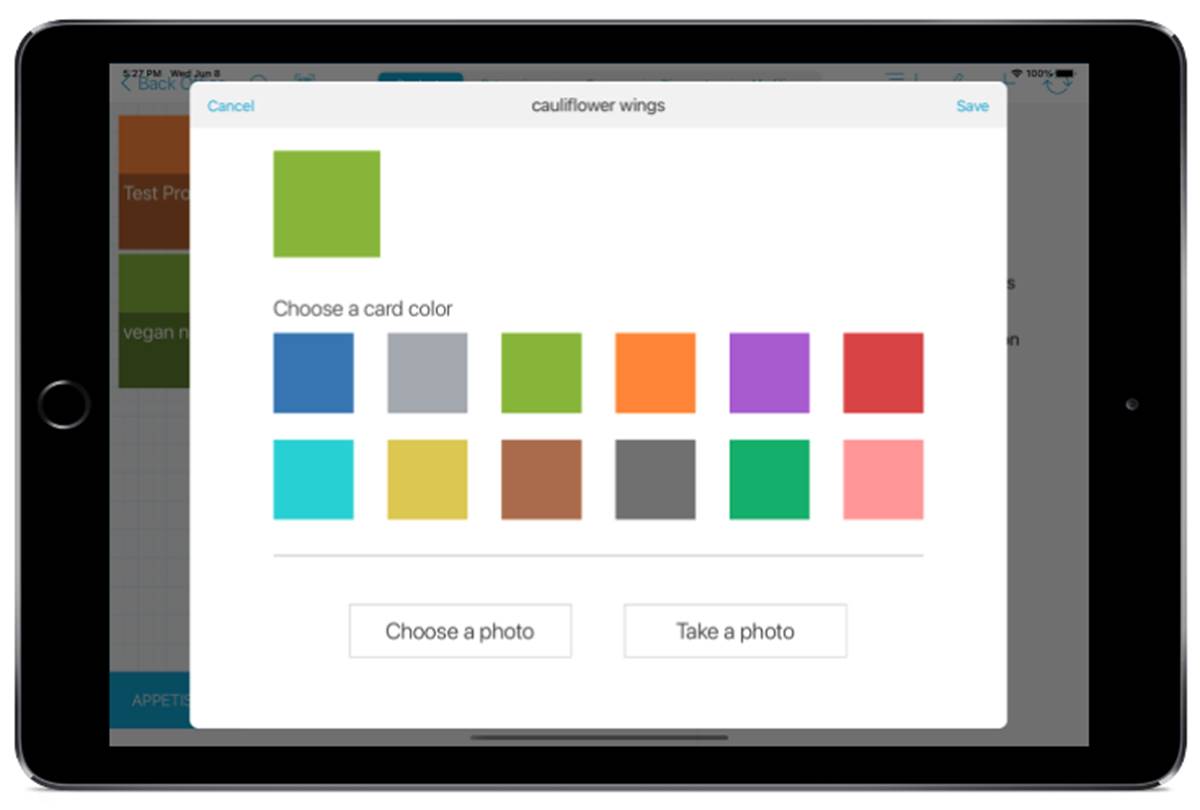
- If you wish to just change the color of the tile, select from the different color options available.
- If you have a photo already saved on your iPad, use the Choose a Photo option. There may be a prompt for access to Photos. Press OK then select your desired photo.
- If you want to take a picture, select Take a Photo. There may be a prompt for access to Camera. Press OK and take a photo when ready.
- Once you are done making changes, press the save button in the top right corner.
- Return to the register to see that your product tile has been updated.
Back to top
Add menu images from talech.com
| Note: Images must be a JPG or PNG file type and the max size allowed is 2MB. |
Before completing these steps, find and save the image you want to use to your desktop.
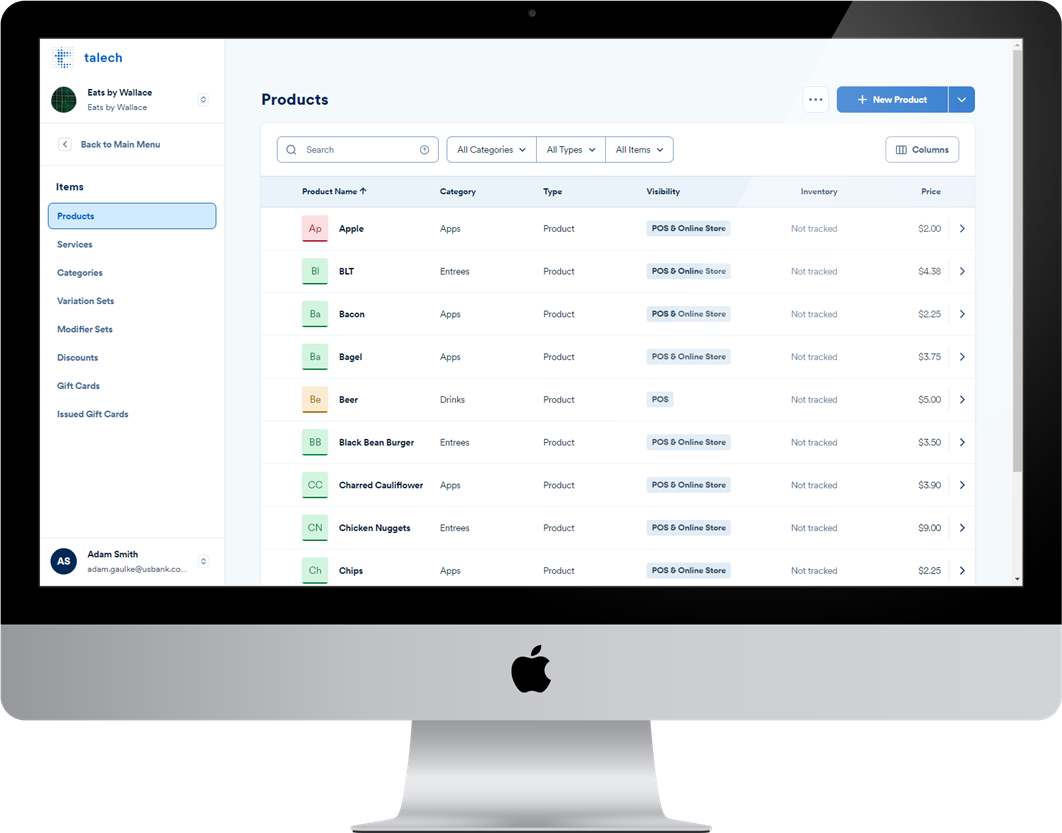
- Log in to talech.com and select Items > Products.

- Find and select a product.
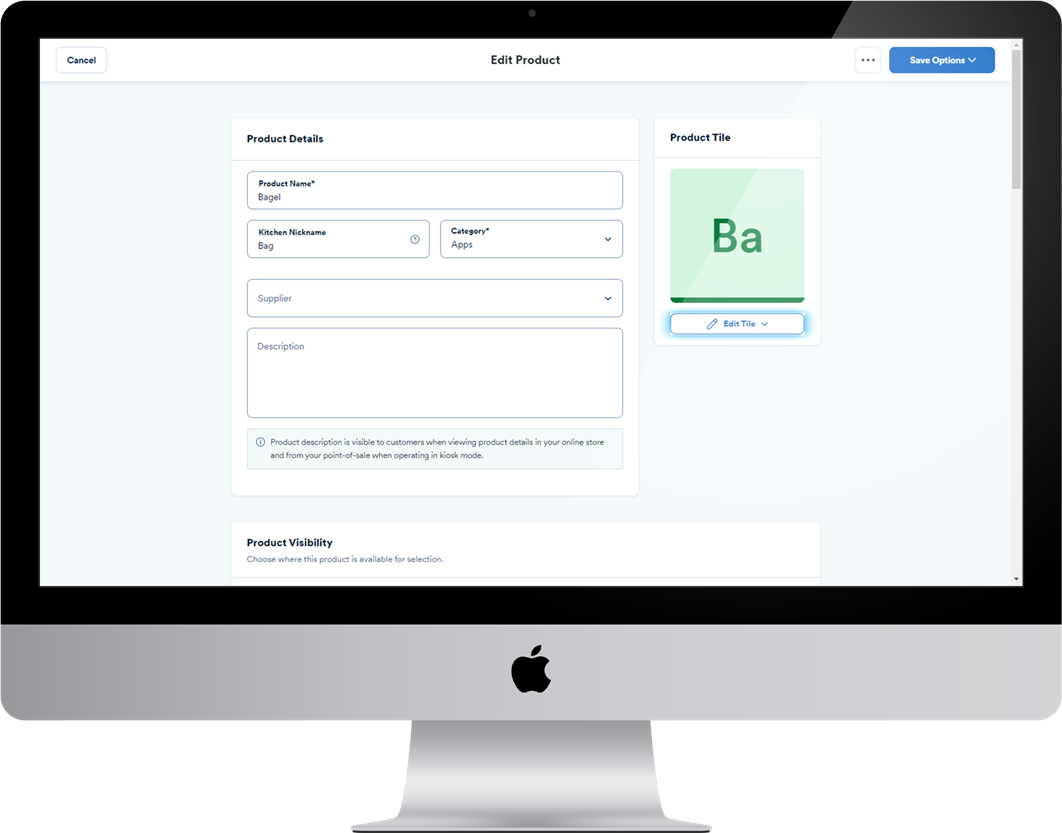
- Under Product Tile, select Edit Tile.
- Select Upload Image.
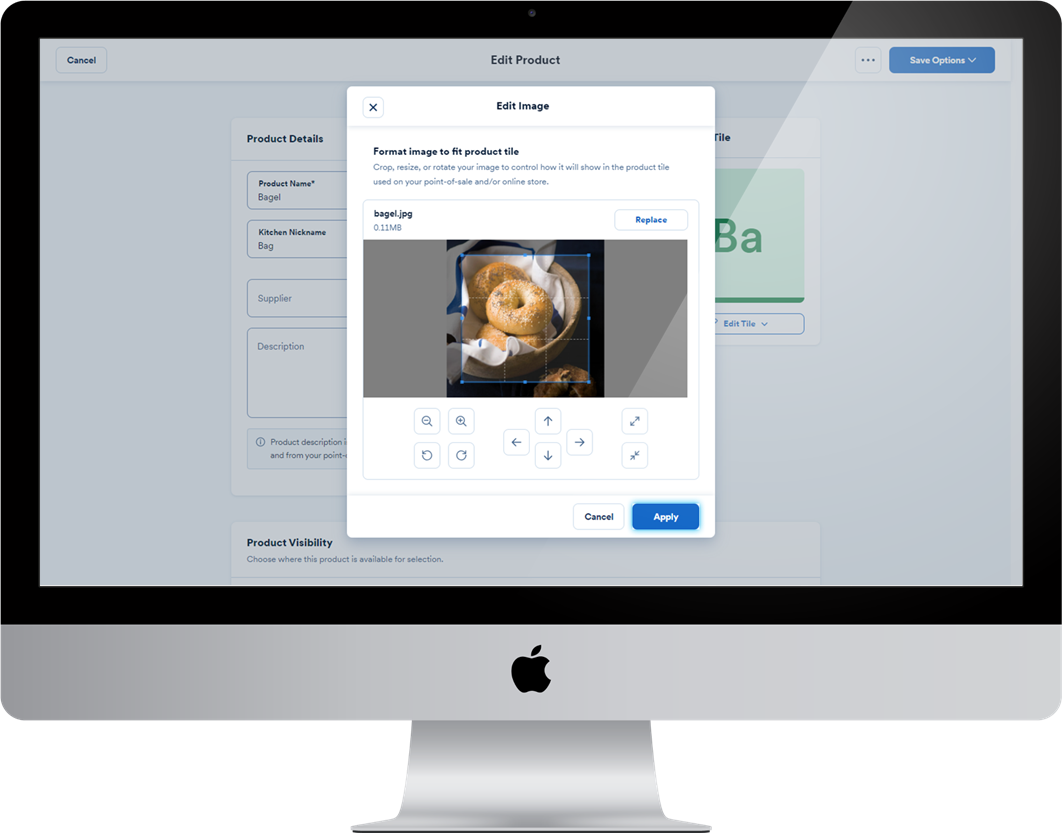
- Locate and upload the image from your computer.
- Use the image editor tool to crop or resize the image.
- Once satisfied, select Apply.
- Select Save Options in the top right and select Save Changes from the drop-down to save changes to this store only. Or, if you have a multi-store account, you can select Save Changes & Sync to update your product across all your stores.
Back to top
Need more help?
- talech training & device support: 1-888-995-1998
- Paytura merchant support: 1-855-4-PAYTURA or contact Paytura