This article will show you how to view, create or manage your appointments from talech.com.
This article applies to the following:
| Region |
|---|
|
| Tier |
|---|
|
| Business type |
|---|
|
In this article
View and manage your appointments
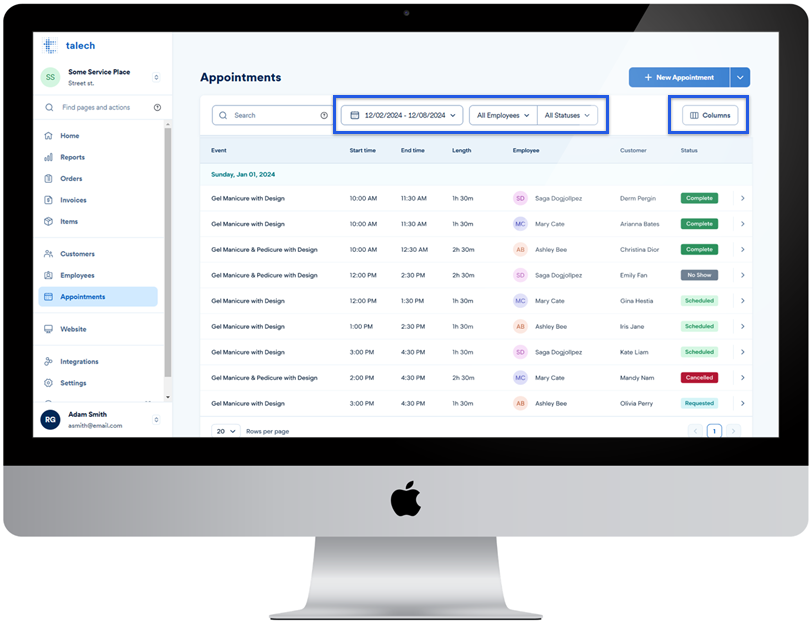
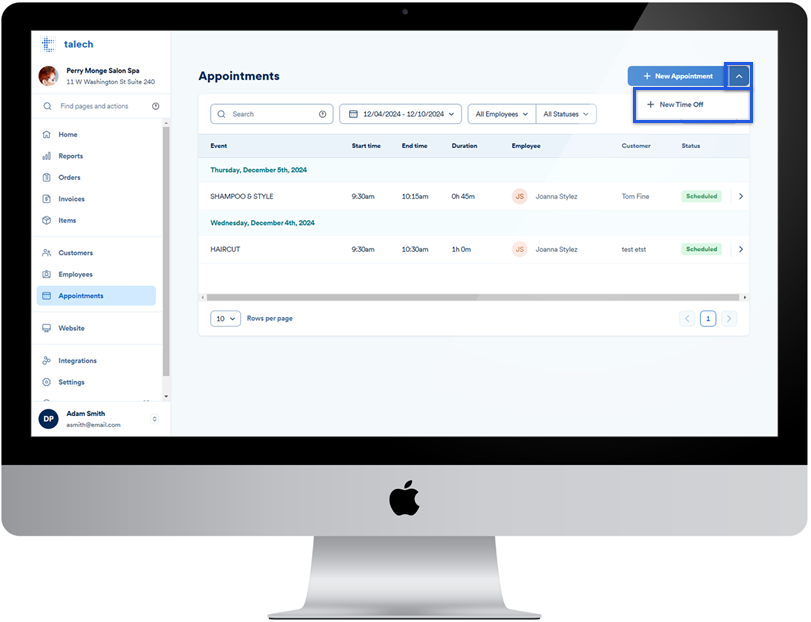
You can view and manage your appointments from the Appointments dashboard on talech.com.
View your appointments
- Select Appointments from the navigation menu.
- This is your Appointments dashboard. All appointments display by default for any employee and in any status (requested, scheduled, rejected, cancelled, etc.).
- You can filter the appointments by date/time period, employees, or appointment status. You can also use the Columns button to show/hide different columns of information.
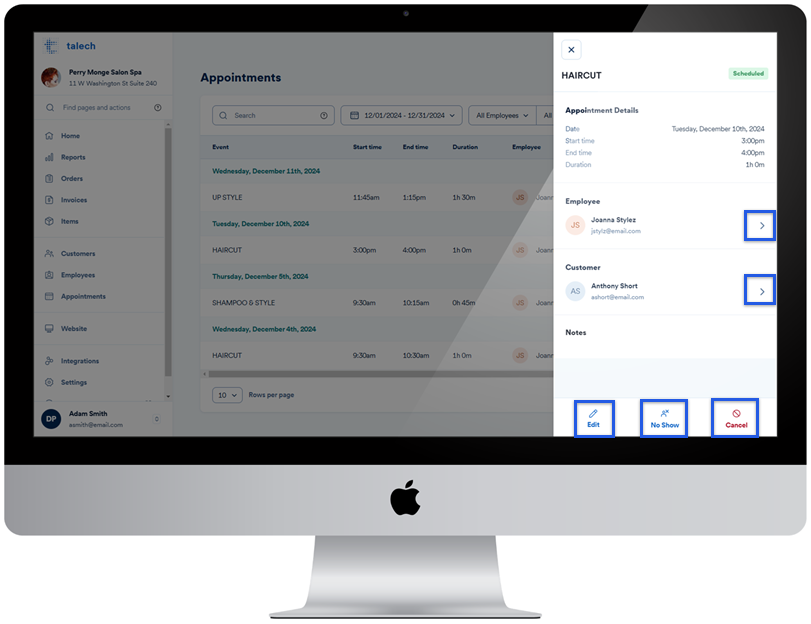
- Select an appointment to open the details. From the details side menu, you can
- Edit the appointment by selecting Edit at the bottom.
- Edit the employee or customer profile selecting the arrow next to either name.
- Select No Show if the appointment has passed and the customer didn’t show up. You’ll only see this option if it’s past the day and time of the scheduled appointment.
- Cancel the appointment by selecting Cancel.
Back to top
Create an appointment
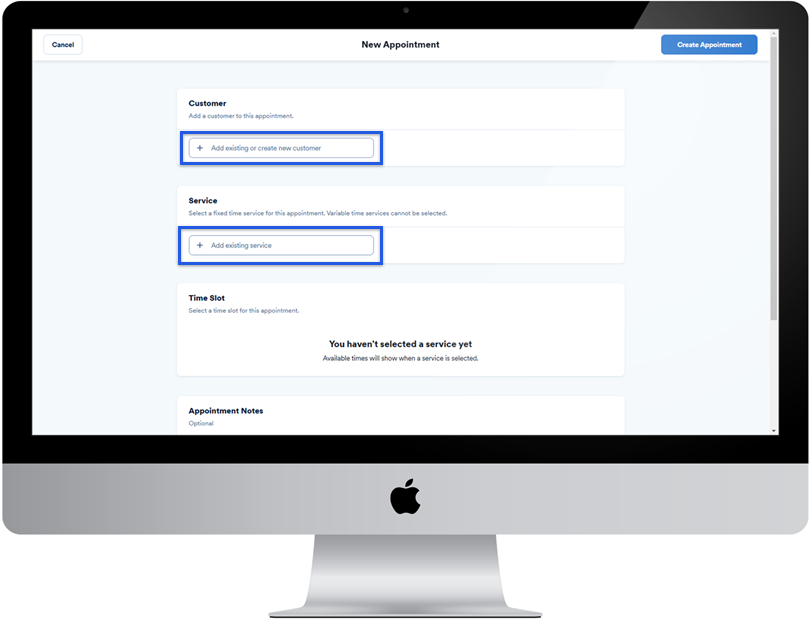
- Select the New Appointment button in the top right.
- This opens the New Appointment menu. Fill in the following fields to schedule an appointment for your customer.
- Customer: Add from your existing customers or create a new customer and complete the customer profile.
- Service: Select the service your customer wants from your existing fixed time services. You can’t select a service with a variable time associated with it.
-
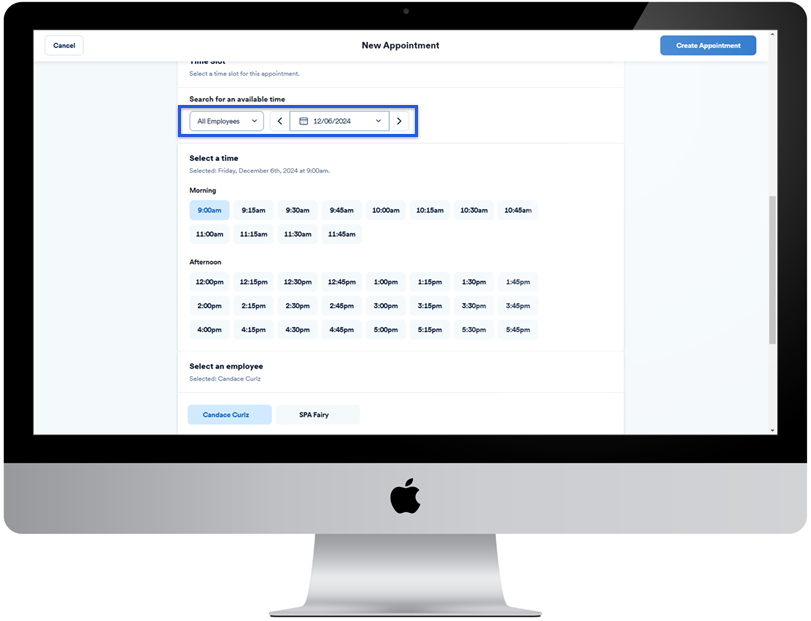
- Time Slot: Select a date to see the available times and available employees (if more than one employee is available, select from those listed). Or select a specific employee and then a date to see if there is any availability on that day.
-
- Add any notes specific to the customer’s appointment in the Appointment Notes at the bottom.
- Select Create Appointment when done.
Back to top
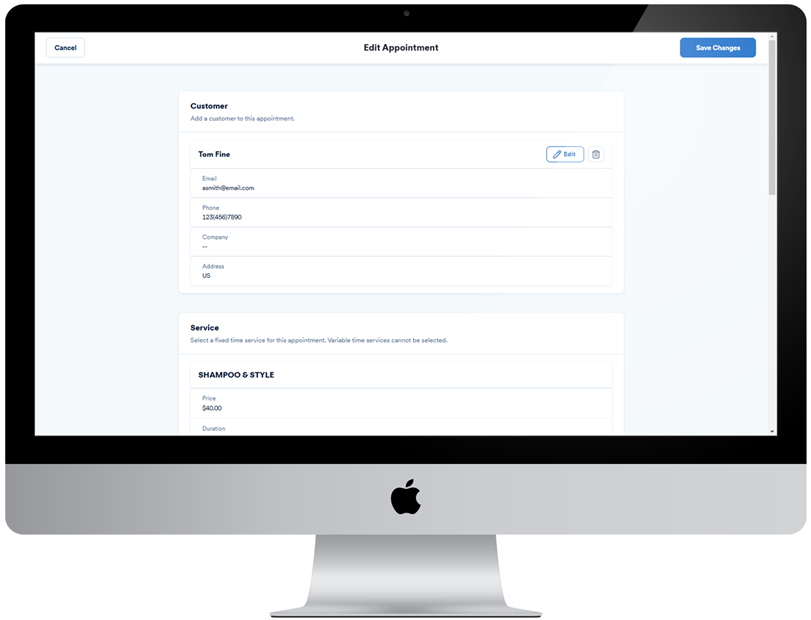
Edit an appointment
- Select an appointment to open the details.
- Select Edit to open the Edit Appointment menu where you can edit any of the details related to the appointment.
- Once you have made your changes, select Save Changes.
Cancel an appointment
- Select an appointment to open the details side menu.
- Select Cancel.
- Confirm the cancellation by selecting Cancel Appointment.
Back to top
Add an employee’s time off to your appointment calendar
Adding an employee’s time off will ensure that services aren’t scheduled for them while they are not available.
- Select Appointments from the navigation menu.
- Select the down arrow next to the New Appointment button and then select New Time Off.
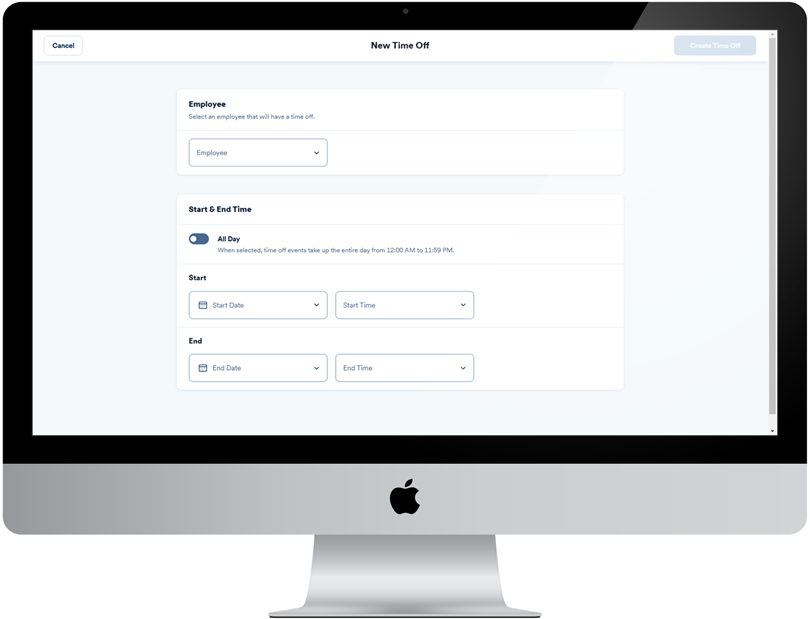
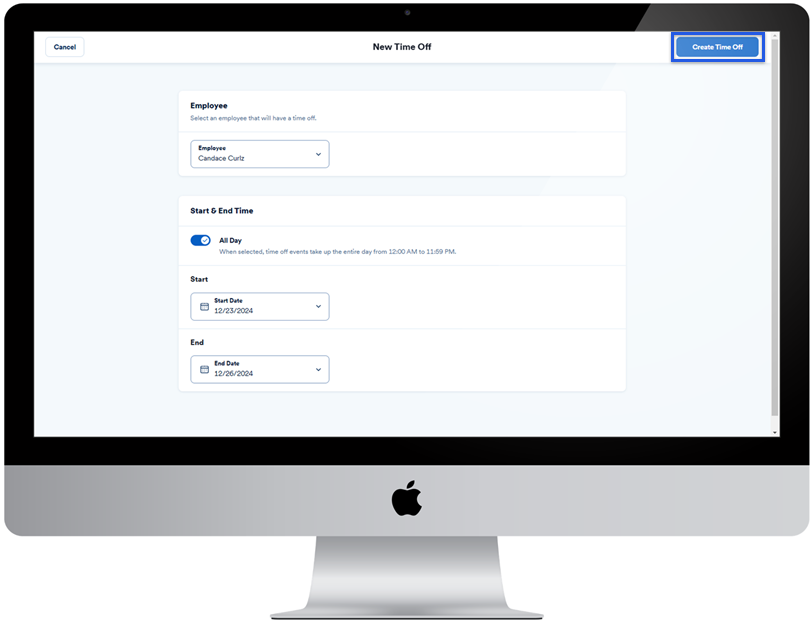
- Select the employee from the Employee dropdown field.
- In the Start & End Time section, set the date and times for the time off.
- If the employee will be gone for the entire business day, toggle the All Day option to ON. Then, select the Start Date and End Date.
- If the employee will only be gone for part of the business day, select a Start Date and Start Time. Then select the End Date and End Time.
- When done, select Create Time Off.
Back to top
Need more help?
- talech training & device support: 1-888-995-1998
- Paytura merchant support: 1-855-4-PAYTURA or contact Paytura