This article will showcase the end-to-end experience of appointment booking.
In this article
- Appointment creation – customer experience
- View appointment calendar – merchant experience
- Customer notifications
- The checkout flow
Appointment Creation - Customer Experience
This section will cover the customer’s experience when booking an appointment via the microsite.
Note:
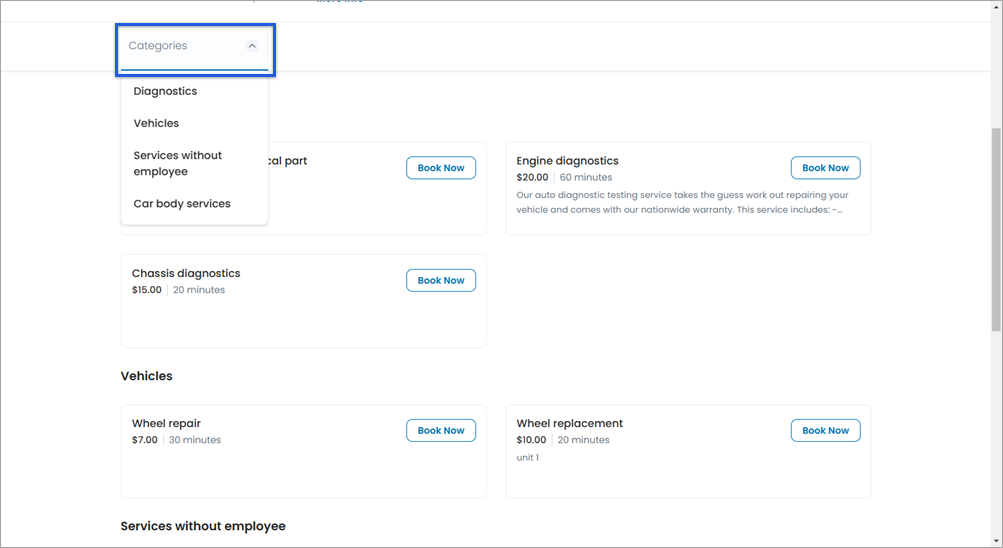
- Depending on which settings are enabled, the microsite may look different. While on the microsite, a list of services will appear. Clicking on a service’s name will display additional details such as the service description and any modifiers and variations.
- Only Fixed Time services will appear on the microsite. Per Hour services can only be accessed via the talech Register at the time of sale.
-
Your client will access your microsite via your link and will see your business’s booking page.
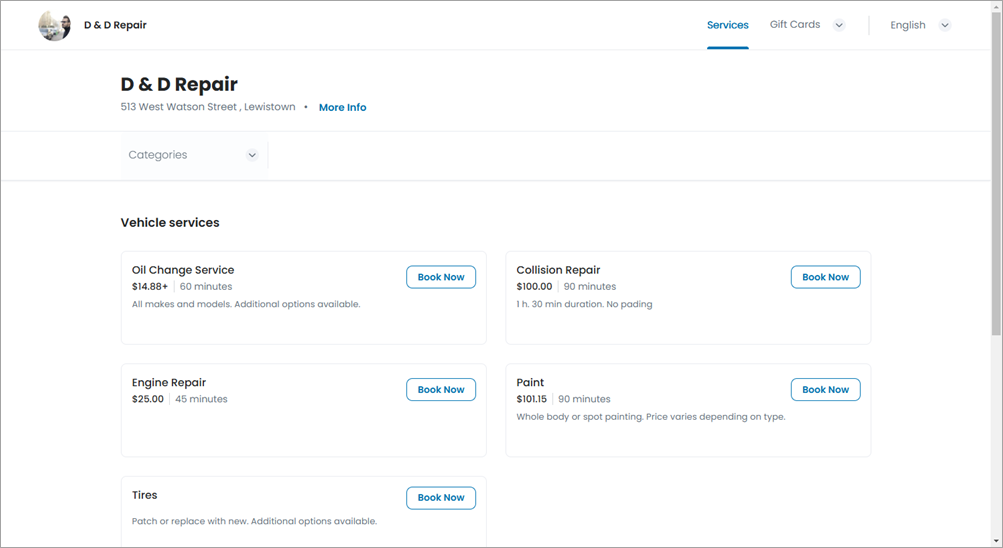
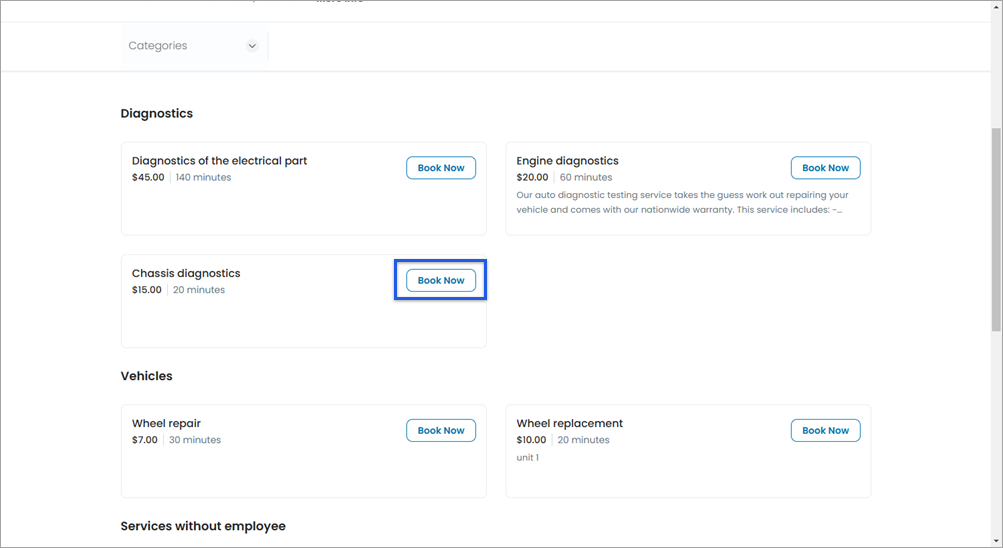
- Your client can select different categories of services from the Categories dropdown menu at the top. Or they can scroll the page to find the service they wish to book.
- Once located, your client selects Book Now on the service they’d like to request an appointment for.
- On the Book Appointment page, the customer selects any modifiers or variations associated with your service at the top of the page. In this example, they can select a specific employee or have any staff member assigned.

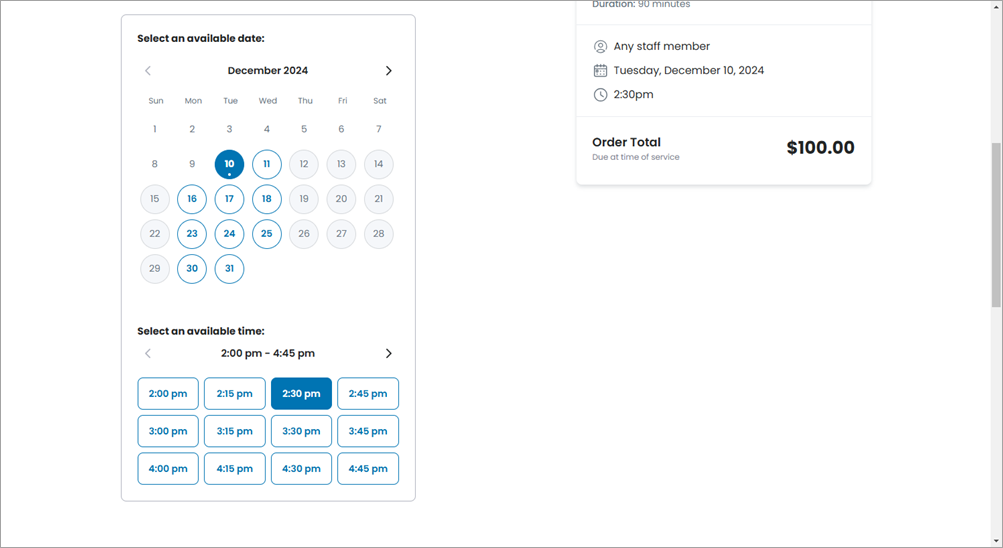
- The customer selects a date and time from the calendar of available dates.
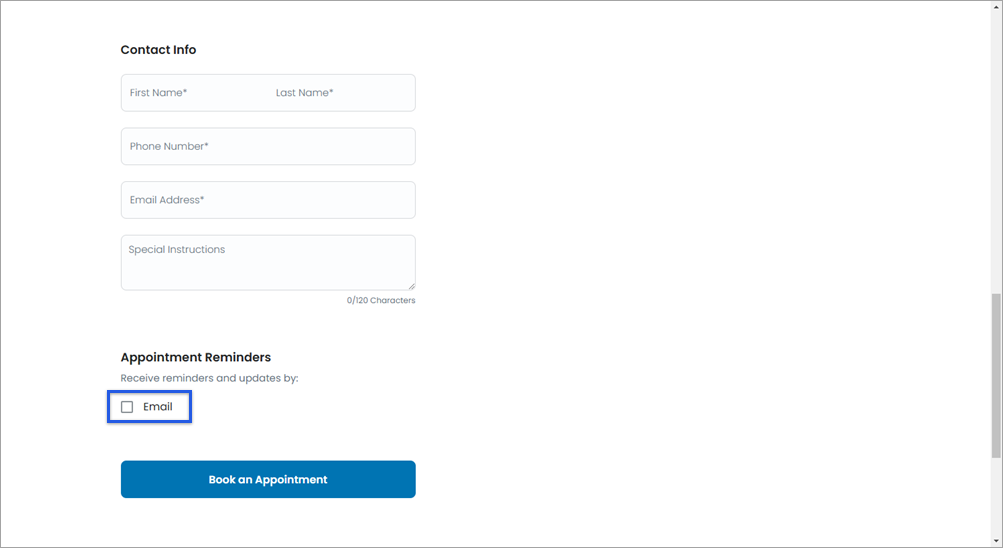
- Then, the customer inputs their contact information and any special instructions they require.
- They can elect to receive appointment reminders via email by checking the box for Email.
- Once done, they click Book an Appointment.
- A confirmation page displays with a summary of their appointment with the following additional details:
- Buttons to add to Google or iCalendar
- Cancellation policy
- Status bar
- Appointment details
- Location info
- Book Another Appointment button
Back to top
View appointment calendar – merchant experience
There are two different ways you can view your calendar. One is from the talech App, and the other is from talech.com.
Once an appointment is generated via the microsite, the appointment will need to be approved or declined. If the Auto Accept Bookings setting is enabled, this step will not be necessary.
talech Register app calendar view
Follow the steps below to view the calendar and approve or decline appointments from the talech Register App.
-
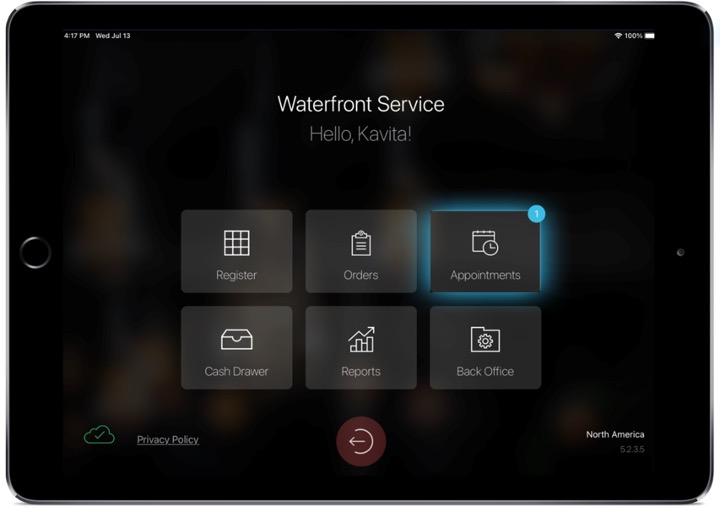
Login to the talech Register App. Select Dashboard > Appointments.
-
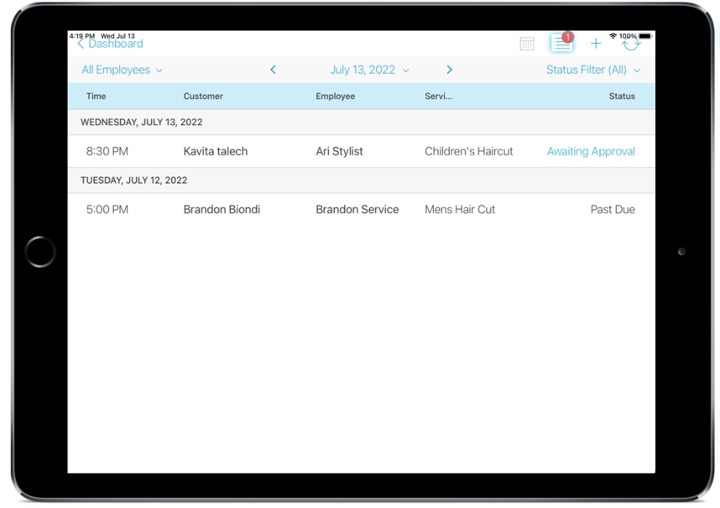
You can toggle between the calendar or list views in the appointments section. By selecting the list view with the notification above it, the appointments awaiting approval will be accessible at the top of the list.
-
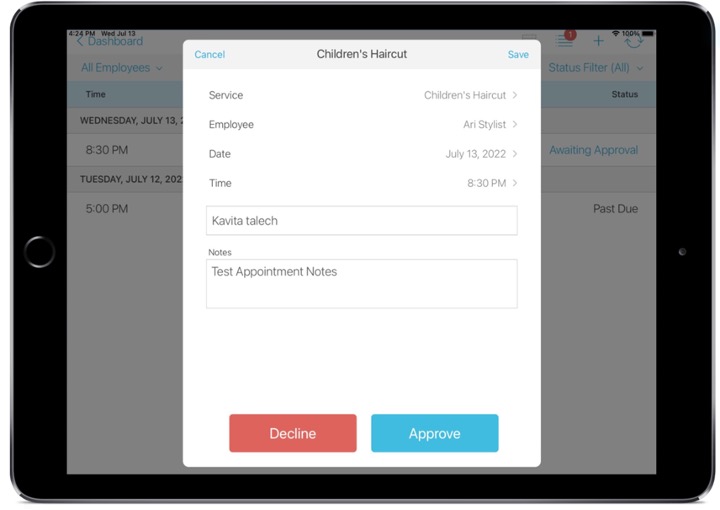
After selecting an appointment that is Awaiting Approval, you will be prompted to Approve or Decline that appointment booking.
Within the calendar view, you can view all the appointments booked in the selected time period on a weekly or daily view.
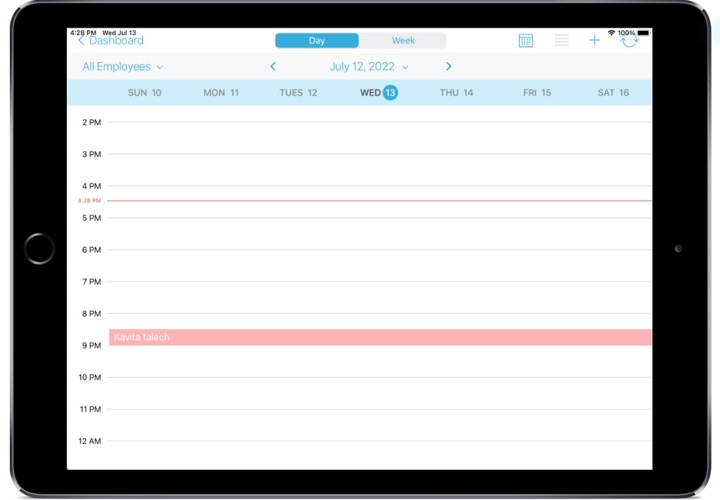
Additional functionality in the calendar view includes:
- Sorting by appointment status (scheduled, confirmed, completed, etc.)
- Sorting by employee
- Viewing a specific day or week range
- Creating new appointments manually, such as walk-ins
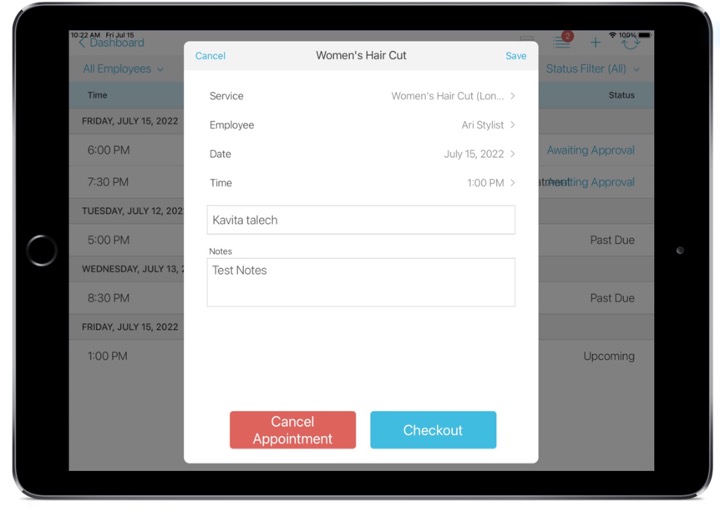
- Editing existing appointments
- Cancelling existing appointments
- Marking existing appointments as a no show
- Completing/Checking out appointments
Back to top
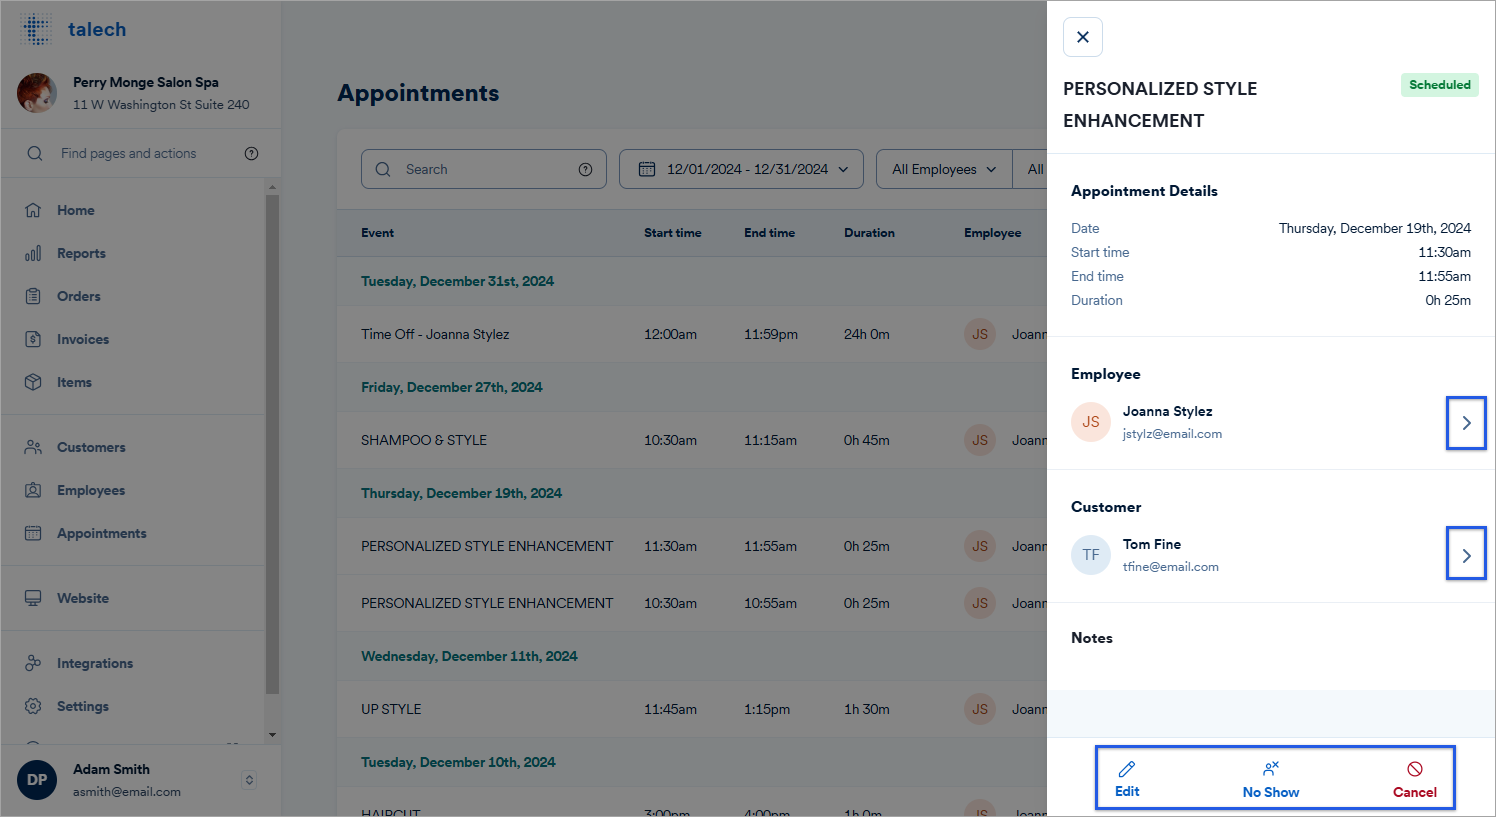
talech.com Calendar View
Unlike the talech Register App’s calendar view, the calendar view on talech.com does not display a notification or alert indicating that appointments are awaiting approval. Approvals for appointments must be performed on your point-of-sale device in the talech Register app.
- Select an appointment to view the details.

- From the side menu, you can update the employee details, customer details, edit, mark as ‘no show’, or cancel.
- Edit the appointment by selecting Edit at the bottom.
- Edit the employee or customer profile selecting the arrow next to either name.
- Select No Show if the appointment has passed and the customer didn’t show up. You’ll only see this option if it’s past the day and time of the scheduled appointment.
- Cancel the appointment by selecting Cancel.
More details on appointment management can be found in this article: Appointment Scheduling – View, Create and Manage
Additional functionality in the calendar view includes:
- Sorting by appointment status (scheduled, confirmed, completed, etc.)
- Sorting by employee
- Viewing a specific day or week range
- Creating new appointments manually, such as walk-ins
- Editing existing appointments
- Canceling existing appointments
- Marking existing appointments as a no show
Back to top
Customer Notifications
Depending on the appointment settings, customers may receive both email and SMS notifications and reminders. Notifications are sent out in the following cases:
|
Appointment Action |
Reason |
|
Appointment Booked |
The appointment has been booked online but has not been approved yet. |
|
Appointment Approved |
The appointment has been approved by an employee. |
|
Appointment Declined |
The appointment has been declined by an employee. |
|
Appointment Reminder |
A reminder notification is sent to the customer to remind them that there is an upcoming appointment. |
|
Appointment Modified |
A notification that the appointment has been changed in some regard. |
|
Appointment Cancelled |
The appointment has been canceled. |
|
Appointment Marked as No Show |
The appointment has been marked as a no-show. This only appears when the appointment time has passed. |
|
Appointment Complete |
The appointment has been checked out and completed. |
Back to top
The Checkout Flow
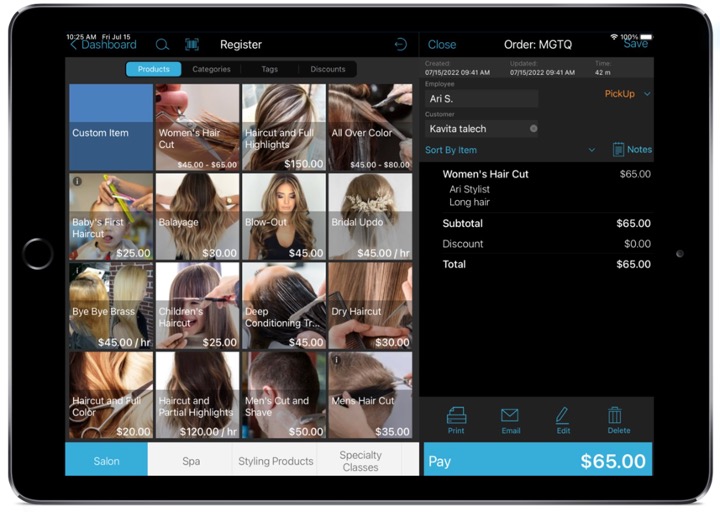
Once an appointment has been completed, select the appointment either in the calendar view or the list view on the talech Register App. From here, you have the option to checkout and collect payment for the appointment, or if it is past the scheduled time mark the customer as a No Show.
When you are on the checkout screen, you can add additional items to the order before processing payment.
Need more help?
- talech training & device support: 1-888-995-1998
- Paytura merchant support: 1-855-4-PAYTURA or contact Paytura